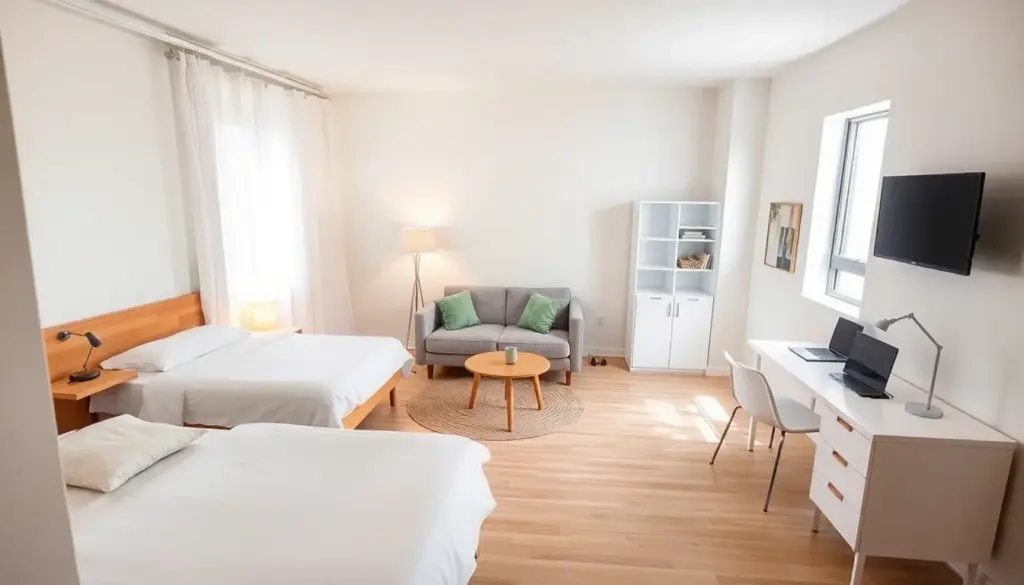
The best studio apartment ideas aren’t about making your space look like a Pinterest board — they’re about making one room function like four. When your bedroom, living room, office, and kitchen share a single floor plan, the difference between “cramped box” and “this actually works” comes down to one skill: zoning.
I’ve lived in three studios (ranging from 280 to 450 sq ft) and helped friends set up six more. The pattern is always the same: people buy furniture first and figure out zones later. That’s backwards. Zones come first — furniture follows.
In this guide, you’ll learn the 3 types of zone dividers that professional designers use, then see exactly how to create 10 functional zones in a single room, each with a specific divider recommendation and budget product picks in the $25-$75 range.
Grab the free Studio Apartment Zone Planner — a printable worksheet that helps you map your zones before moving a single piece of furniture.
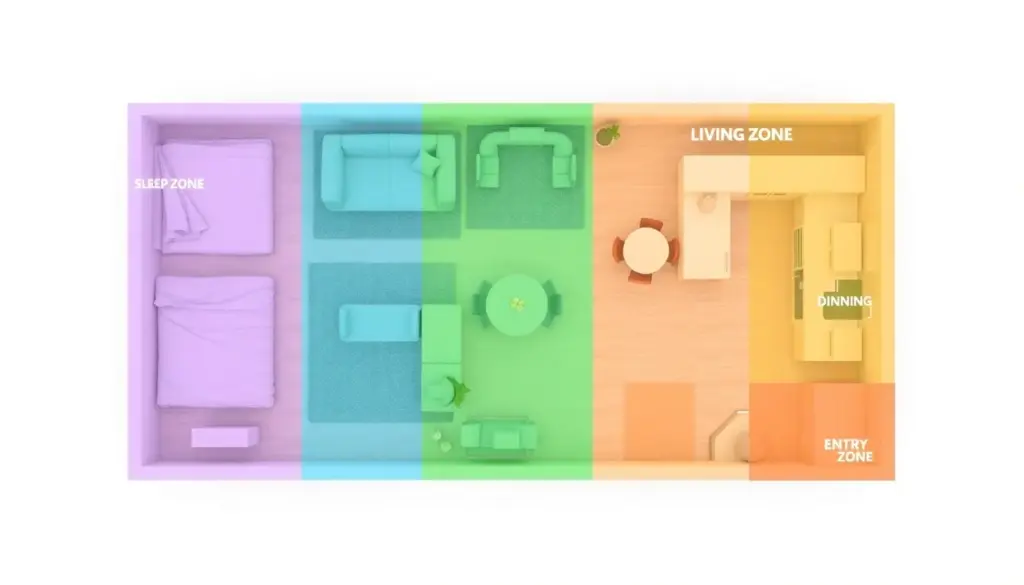
One room, 10 zones. Each color represents a different functional area — all in 400 sq ft.
In this guide:
- The 3 Types of Zone Dividers
- Zone 1: Sleep Zone
- Zone 2: Living/Lounge Zone
- Zone 3: Work Zone
- Zone 4: Dining Zone
- Zone 5: Kitchen Prep Zone
- Zone 6: Entry/Drop Zone
- Zone 7: Closet/Dressing Zone
- Zone 8: Entertainment Zone
- Zone 9: Relaxation Nook
- Zone 10: Guest Zone
- The Zone Priority Quiz
- FAQ
The 3 Types of Zone Dividers
Before touching any furniture, understand the three tools you have for dividing a studio apartment into zones. Every zone recommendation in this guide uses one or more of these.
| Divider Type | What It Does | Best For | Examples |
|---|---|---|---|
| Visual | Creates perceived separation using color, rugs, or patterns — without blocking sight lines | Maintaining openness in studios under 350 sq ft | Different rugs per zone, accent wall paint, distinct lighting color temperatures |
| Physical | Creates actual separation with furniture or objects positioned as barriers | Studios over 350 sq ft where you can afford to lose some sightline | Bookshelf perpendicular to wall, curtain on ceiling track, sofa back as divider |
| Lighting | Creates psychological separation by giving each zone its own light character | All studio sizes — works alone or combined with visual/physical dividers | Task lamp in work zone, warm ambient in sleep zone, bright in kitchen |
The key insight: you don’t need walls to create rooms. According to research in environmental psychology, humans perceive zone boundaries through any consistent change in sensory input — a shift in floor texture, light temperature, or visual pattern is enough for the brain to register “different space” (Gifford, Environmental Psychology: Principles and Practice).
Most studios need a mix of all three divider types. Use visual dividers everywhere (they’re free or cheap), add physical dividers for your highest-priority zone (usually sleep), and layer lighting dividers on top of both.
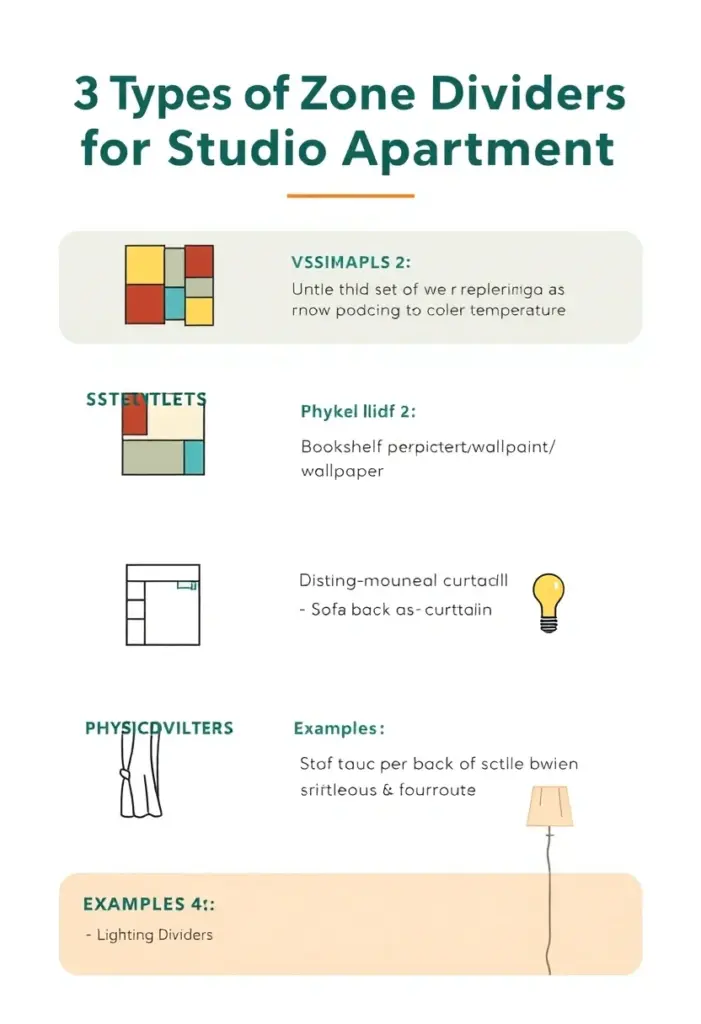
The 3 divider types at a glance. Most zones use a combination.
Zone 1: Sleep Zone
Priority level: Essential (non-negotiable)
Best divider type: Physical + Lighting
Budget range: $30-$75
Your sleep zone is the most important area to separate. If you can see your bed from your desk or sofa, your brain never fully disconnects from “sleep mode” during the day — and never fully enters it at night. A 2019 study from the National Sleep Foundation found that bedroom environment significantly impacts sleep quality, and visual separation from daytime activities is a key factor.
How to separate a sleeping area in a studio apartment:
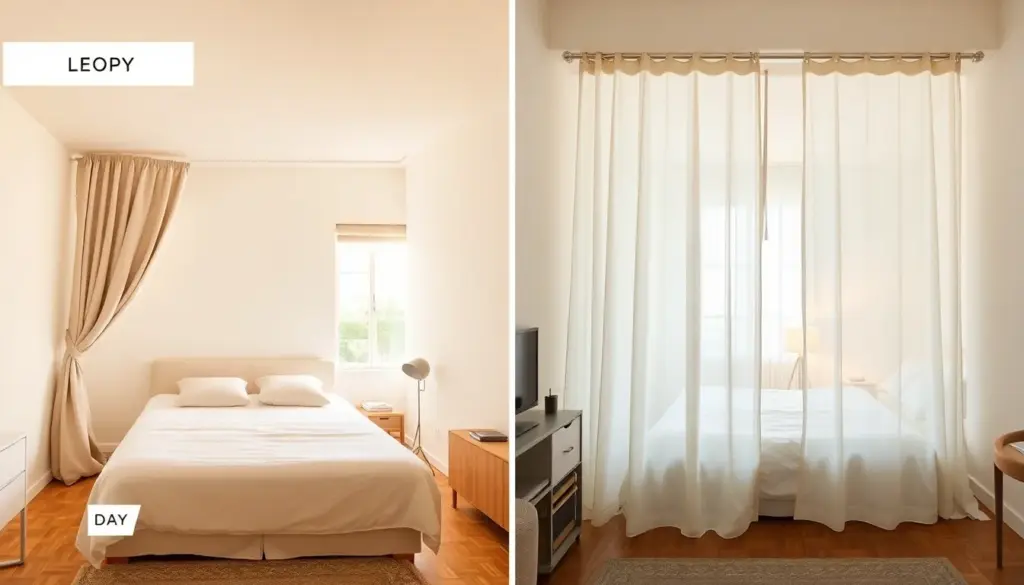
- Ceiling-mounted curtain track ($25-$40). Install a curved or straight curtain track on the ceiling around your bed area. Use floor-length curtains that you can close at night and open during the day. This is the single most effective studio apartment room divider for sleep zones — it provides full visual and partial sound separation.
- Tall bookshelf as headboard wall ($35-$75). Position a 72-inch bookshelf perpendicular to the wall at the head of your bed. It creates a physical barrier, provides storage on the living-room side, and defines the boundary without blocking all light.
- Lighting shift: Use warm, dim lighting (2200-2700K) exclusively in the sleep zone. No cool white or bright overhead lights. A bedside lamp with a warm bulb ($12) is enough. This trains your brain to associate this area with rest.
Placement rule: Put your sleep zone in the area farthest from the apartment entrance and farthest from the kitchen. You want maximum distance from noise and activity.
Budget pick: A tension rod curtain system ($15-$25) works if you can’t drill into the ceiling. Install it between two walls to create a curtain boundary without any permanent installation — fully renter-friendly.
Zone 2: Living/Lounge Zone
Priority level: Essential
Best divider type: Visual (rug) + Lighting
Budget range: $40-$65
The living zone is your decompression space. It should feel distinct from both your work zone and sleep zone.
Setup:
- Define with a rug. A 5×7 or 6×9 area rug under your sofa and coffee table instantly creates a visual boundary. The rug edge = the zone edge. Choose a rug that contrasts subtly with your flooring — this contrast is what the brain reads as “different area.”
- Sofa positioning. If your studio is large enough (400+ sq ft), use your sofa’s back as the physical divider between living and another zone. This is the Open Concept Divider layout from our layout guide.
- Lighting: A floor lamp and an LED strip behind the TV. Warm white (2700K) but slightly brighter than the sleep zone. This zone should feel relaxed but awake.
What belongs here: Sofa, coffee table, TV, one floor lamp, one side table. Nothing else. Apply the restraint principle — in a studio, every extra object in the living zone bleeds visual clutter into every other zone.
Zone 3: Work Zone
Priority level: Essential (if you work from home) / Optional (if you don’t)
Best divider type: Physical + Lighting
Budget range: $50-$75
The work zone needs the strongest psychological boundary of any zone in your studio. When you’re “at work,” you need to not see the bed or the TV. When you’re “off work,” you need to not see the desk.
Setup:
- Desk placement: Face the desk toward a wall or window — never toward the living zone. The facing-away rule is critical. If you can see the sofa from your desk chair, you’ll be distracted.
- Physical divider: A slim bookshelf tower (12-14″ wide) between the work zone and the adjacent zone. Or position the desk in an alcove or corner that’s naturally semi-enclosed.
- Task lighting: A desk lamp with cool-white light (4000-4500K) while the rest of the studio uses warm light. This color temperature shift signals “focus mode” to your brain. Research from the American Society of Interior Designers supports that light temperature affects cognitive performance and mood transitions.
- Cable management: Use adhesive cable clips ($5-$8) to route all cables behind the desk and along the wall. Visible cable chaos makes a work zone feel like a tangled afterthought, not a designated space.
The “closing time” ritual: When you’re done working, physically close the laptop, turn off the desk lamp, and turn on the living zone lights. This lighting switch is your commute. Without it, you’ll feel like you’re always at work.
Zone 4: Dining Zone
Priority level: High (you need somewhere to eat that isn’t the sofa)
Best divider type: Visual (lighting + distinct surface)
Budget range: $35-$60
You don’t need a dining room. You need a spot where eating feels intentional.
Setup:
- A small round table (30-36″ diameter) with two chairs. Round tables have no corners to bump in tight spaces and seat 2-4 people flexibly. A foldable drop-leaf table ($35-$60) collapses flat against the wall when not in use.
- Placement: Adjacent to the kitchen, ideally between the kitchen and the living zone. The dining zone acts as a natural transition space.
- Lighting: A pendant light or plug-in swag lamp ($20-$35) directly above the table. Dining-specific lighting makes the zone feel real, even if it’s just a 30-inch circle of space. According to The Spruce, the bottom of a pendant should hang 30-34 inches above the table surface for proper ambiance.
- No rug needed under a dining table in a studio — it creates cleaning hassle and the lighting already defines the zone.
Zone 5: Kitchen Prep Zone
Priority level: Essential
Best divider type: Physical (counter/cart) + Lighting
Budget range: $30-$60
Most studio kitchens are galley-style or L-shaped with minimal counter space. The goal isn’t to create a “kitchen zone” (the kitchen already has walls or counters) — it’s to extend the usable kitchen into the main room.
Setup:
- A slim rolling cart ($30-$50) as a portable island. Park it at the edge of the kitchen area during cooking, roll it against a wall when done. This extends your counter space by 3-4 sq ft without permanently eating floor area.
- Wall-mounted storage: Magnetic knife strip, wall-mounted spice rack, hanging utensil rail. Every item on your counter that moves to the wall frees up prep space. See our pantry organization guide for a complete kitchen storage system.
- Under-cabinet LED strips ($10-$15). These provide task lighting directly on your counters and make the kitchen feel like a defined, functional zone even when the main room lights are dim.
Zone 6: Entry/Drop Zone
Priority level: High
Best divider type: Visual (distinct wall treatment + small furniture)
Budget range: $25-$45
Even if your front door opens directly into the main room, you need a psychological “airlock” — a small zone that says “you’ve arrived” and gives you a place to drop keys, shoes, and bags.
Setup:
- Wall-mounted key holder + mail shelf ($10-$20). Mount it at eye level within arm’s reach of the door.
- Slim shoe bench or small console ($25-$40). No wider than 36 inches, no deeper than 14 inches. This is your landing pad.
- A small rug or mat ($10-$15) in front of the door, distinct from your main floor. The texture change underfoot signals “entry zone.”
- A single hook or wall-mounted coat rack ($8-$12) for your daily jacket. Don’t try to store your entire wardrobe here — just today’s jacket.
The 3-second rule: When you walk through the door, you should be able to drop keys, kick off shoes, and hang your jacket within 3 seconds without walking more than 2 steps. If your drop zone fails this test, reconfigure it.
Zone 7: Closet/Dressing Zone
Priority level: Medium
Best divider type: Physical (rack + curtain)
Budget range: $40-$75
If your studio lacks a closet (common in pre-war apartments and converted spaces), you need to create one. Even if you have a closet, you may need a dressing zone outside it.
Setup:
- A freestanding clothing rack ($20-$40) for your current-season wardrobe. Position it against a wall in or near the sleep zone.
- Curtain concealment: Hang a curtain from a ceiling track or tension rod in front of the rack. When closed, it hides the visual clutter of hanging clothes. When open, it’s your dressing area.
- Full-length mirror ($15-$25) mounted on the wall adjacent to the rack. This defines the space as “dressing area” and makes the studio feel larger by reflecting light.
- Storage below: Use the floor space under the rack for shoe storage bins or a low dresser.
Zone 8: Entertainment Zone
Priority level: Medium
Best divider type: Visual (focal wall) + Lighting
Budget range: $25-$50
In a studio, the entertainment zone often overlaps with the living zone. The key is to make the TV wall feel intentional, not like you just stuck a screen on the nearest surface.
Setup:
- Wall-mount the TV. This is non-negotiable in a studio — a TV stand wastes 4-6 sq ft you don’t have. Mount it at eye level when seated (center at ~42 inches from the floor).
- LED bias lighting ($10-$15) behind the TV. This reduces eye strain, adds ambient depth, and visually defines the entertainment wall as a zone.
- Floating shelf below the TV ($15-$25) for a soundbar and 1-2 objects (a small plant, a candle). Keep it minimal.
- Cable concealment: Run cables through a wall-mounted cable channel ($8-$12) or behind an adhesive cable raceway. Visible cables running down the wall from a mounted TV undo the clean look instantly.
Zone 9: Relaxation Nook
Priority level: Low (but high quality-of-life impact)
Best divider type: Visual (chair + lighting)
Budget range: $35-$60
This is your reading corner, meditation spot, or just-stare-out-the-window zone. It’s separate from the living zone because its purpose is solo quiet time, not TV or socializing.
Setup:
- One comfortable chair (not the sofa) positioned near a window. An accent chair, papasan chair, or even a large floor cushion works.
- A small side table for a book and a drink.
- Dedicated lighting: A reading lamp or clip-on light. The relaxation nook should have its own light source independent from the living zone.
- Placement: Near the window with the best natural light. This zone doesn’t need physical dividers — the chair-and-lamp combination, slightly separated from the main seating, creates enough distinction.
Zone 10: Guest Zone
Priority level: Low
Best divider type: Physical (convertible furniture)
Budget range: $50-$75
You probably can’t dedicate permanent space to guests in a studio. The solution: design a zone that converts.
Setup:
- A sofa with a pull-out bed or a daybed with a trundle. During the day, it’s your living zone seating. At night, it converts to a guest bed. This dual-purpose approach is essential in a studio.
- Bedding storage: Store guest bedding in a storage ottoman or under-bed bins. It should be accessible within 2 minutes of a guest arriving.
- Privacy provisions: If you have a curtain track around your sleep zone (Zone 1), your guest effectively gets the living zone as their own semi-private space when the curtain is closed.
The hosting test: Can you convert from “normal studio” to “guest-ready studio” in under 10 minutes? If not, simplify your guest setup.
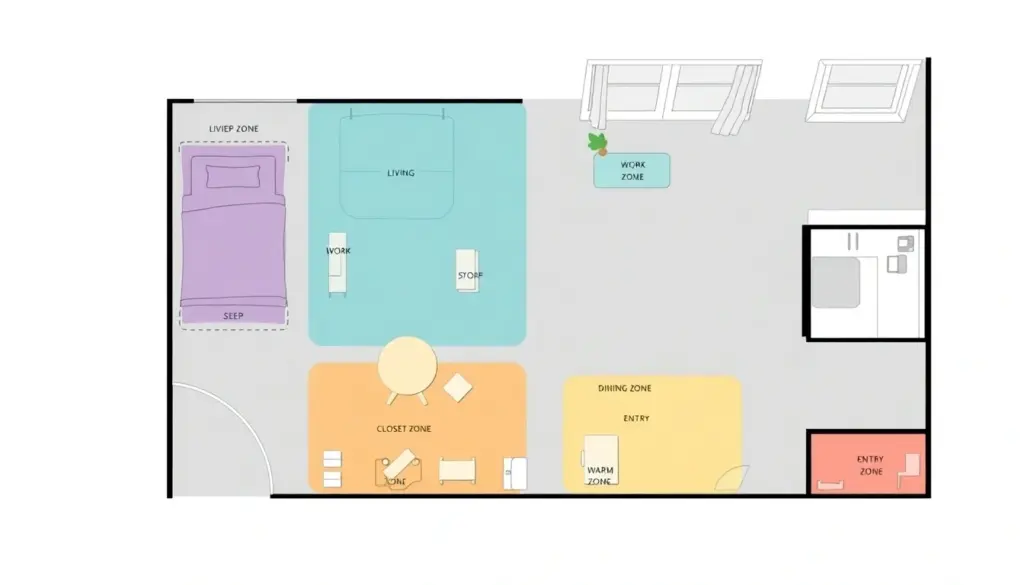
All 10 zones mapped onto a 400 sq ft studio. Not every studio needs all 10 — start with the essentials (sleep, living, work, dining, entry) and add others as needed.
The Zone Priority Quiz
Not every studio needs all 10 zones. Answer these three questions to find your top priorities:
Question 1: Where do you spend the most non-sleep hours?
– Working from home → Prioritize Zones 3 (Work) and 9 (Relaxation Nook)
– Watching TV / gaming → Prioritize Zone 8 (Entertainment) and Zone 2 (Living)
– Cooking and eating → Prioritize Zones 4 (Dining) and 5 (Kitchen Prep)
Question 2: What frustrates you most about your current layout?
– “It feels like I live in my bedroom” → You need stronger dividers on Zone 1 (Sleep)
– “I can never find anything” → Prioritize Zone 6 (Entry/Drop) and Zone 7 (Closet)
– “I have nowhere to host” → Prioritize Zone 10 (Guest) and Zone 5 (Kitchen Prep)
Question 3: What’s your studio’s biggest constraint?
– Under 300 sq ft → Use visual + lighting dividers only; no physical dividers (they’ll eat too much space)
– 300-450 sq ft → Mix all three divider types; 1-2 physical dividers maximum
– Over 450 sq ft → You have room for physical dividers in most zones
Your starting plan: Take your top 5-6 zones from the quiz and set up those first. Add the remaining zones later as you settle in and identify new needs.
Want help mapping your specific layout? Download the Studio Apartment Zone Planner — a printable worksheet with a grid template and zone cards you can cut out and arrange.
Frequently Asked Questions
How do you make a studio apartment feel like a one-bedroom?
The single most effective technique is a ceiling-mounted curtain around your bed area. When closed, it creates a physical “bedroom” with visual and partial acoustic separation. Combine this with a distinct rug in the living zone and different lighting temperatures in each zone (warm/dim in the sleep area, slightly brighter in the living area). These three changes — curtain, rug boundary, lighting shift — make a studio feel like a one-bedroom more effectively than any furniture rearrangement alone.
How to separate sleeping area in studio apartment?
Use a physical divider between the sleep zone and the rest of the studio. The three most effective options: (1) a ceiling-mounted curtain track with floor-length curtains ($25-$40), (2) a tall bookshelf positioned perpendicular to the wall as a headboard/divider ($35-$75), or (3) a tension rod curtain system between two walls ($15-$25). Always pair the physical divider with a lighting shift — warm, dim light in the sleep zone, brighter light elsewhere.
What is the best way to set up a studio apartment?
Start by identifying your top 5-6 zones using the priority quiz above. Then place your sleep zone first (farthest from the door and kitchen), your work zone second (facing a wall or window, away from the TV), and arrange everything else around those anchors. Use the 3 types of zone dividers — visual (rugs, color), physical (furniture barriers, curtains), and lighting (distinct light sources per zone) — to create clear boundaries. Measure your space before buying any furniture.
How to make a studio apartment look bigger?
Three techniques work best: (1) visual continuity — use the same wall color throughout and limit your palette to the 60/30/10 rule, (2) vertical thinking — use wall-mounted shelves, ceiling-height curtains, and tall narrow storage instead of wide low pieces, and (3) visible floor — keep at least 40% of your floor area clear by choosing furniture with exposed legs and eliminating single-purpose pieces. Avoid over-dividing — too many physical dividers in a small studio chop the space up and make it feel smaller, not bigger.
Start With Your Top 5 Zones
The best studio apartment ideas don’t try to do everything at once. Identify your 5 essential zones, set those up properly with the right divider type for each, and leave the rest for later. One well-defined zone beats three half-finished ones.
Your next step: Download the free Studio Apartment Zone Planner (printable worksheet) to map your zones before moving anything. Then start with Zone 1 (Sleep) — it’s the foundation everything else builds on.
Related reading: Small Apartment Decorating: The Complete Budget Guide | 7 Small Living Room Layouts That Actually Work