Budget home decor fails when you spend money in the wrong order. Most people start with throw pillows and wall art — the two categories with the lowest visual impact per dollar — while ignoring paint, lighting, and textiles that would transform their space for the same amount. The difference between a $500 room that looks like $50 and a $50 room that looks like $500 comes down to prioritization, not budget size.
In this guide, you’ll learn the Budget Decor Hierarchy — a proven framework for where to spend first, where to save, and where to DIY — plus room-by-room cost breakdowns, specific product recommendations at every price point, and the common budget decorating traps that waste money without improving your space.
A $340 living room transformation using the Budget Decor Hierarchy. Callouts show where money went.
In this guide
The Budget Decor Hierarchy: Where to Spend First
The most expensive mistake in budget decorating is spending in the wrong order. This hierarchy ranks every decorating category by impact per dollar spent — how much visual transformation you get for your money.
| Tier | Category | Impact Level | $ Investment | DIY Potential |
|---|---|---|---|---|
| 1 | Paint & Color | Highest | $25-$150 per room | Excellent |
| 2 | Lighting | Very High | $15-$100 per room | Good |
| 3 | Textiles (rugs, curtains, bedding) | High | $30-$200 per room | Moderate |
| 4 | Furniture Arrangement & Editing | Medium-High | $0 | Excellent |
| 5 | Art & Wall Decor | Medium | $10-$100 per room | Excellent |
| 6 | Accessories & Styling | Low-Medium | $15-$75 per room | Good |
The rule: Never spend on a lower tier until you’ve exhausted the potential of higher tiers. A room with a $20 paint job and zero accessories will always look better than a room with $200 in accessories and bare walls.
The Budget Decor Hierarchy. Spend top-down, not bottom-up.
This isn’t opinion. It’s based on how the human eye perceives space. Large visual fields (walls, floors, windows) dominate perception. Small objects (candles, vases, throw pillows) are noticed last. When you spend on small objects while ignoring large surfaces, you’re paying for the wrong thing.
Tier 1: Paint & Color (Highest Impact)
A single gallon of paint ($25-$45) covers 350-400 square feet of wall space. That’s enough to transform the dominant visual surface of an entire room for less than the cost of two throw pillows.
Why paint wins:
- Largest visual surface: Walls are 60%+ of what you see in any room. Changing wall color changes the entire room.
- Lowest cost per square foot: At $0.10-$0.15 per square foot, nothing beats paint for impact-to-cost ratio.
- Highly DIY-able: Anyone can paint a room with $30 in tools (roller, tray, brush, tape) and a free weekend.
- Instant transformation: Paint delivers a complete visual change in 4-8 hours.
Budget paint strategy:
| Budget | What to Buy | Result |
|---|---|---|
| $25-$35 | 1 gallon store-brand paint (beige, white, gray) + basic roller kit | One room fully transformed |
| $50-$75 | 1 gallon premium paint (better coverage) + roller kit + edging tool + painter’s tape | One room with professional-looking edges |
| $100-$150 | 2 gallons premium paint + full tool kit + ceiling paint (if needed) | Large room or 2 small rooms |
Where to save on paint:
- Skip the expensive brands for neutral colors. A $30 gallon of Valspar or Behr covers as well as a $60 gallon of Benjamin Moore for basic whites and grays. Color accuracy matters more for bold hues.
- Don’t buy “paint and primer in one” for dark-to-light transitions. It never covers in one coat. Buy separate primer ($15) instead.
- Skip specialty finishes unless you need them. Eggshell works for 90% of rooms. Satin for bathrooms. Flat for ceilings. That’s it.
Where to splurge on paint:
- Any color with red or yellow undertones. These pigments are less stable and tend to shift between batches. Premium brands maintain consistency.
- High-traffic areas. A more durable finish (like Benjamin Moore’s Scuff-X) prevents touch-ups every 6 months.
$35 in paint. Same furniture, same lighting, same accessories. Paint alone transforms the space.Renter’s workaround: Can’t paint? Use peel-and-stick wallpaper on one accent wall ($40-$80) or control color entirely through textiles and removable decor.

Tier 2: Lighting (The Invisible Transformer)
Most homes have terrible lighting. A single overhead fixture, often in the wrong color temperature, that flattens every room into a shadowless, clinical box. Fixing lighting costs less than $100 per room and creates more perceived change than furniture replacement.
The three-layer lighting system:
Every room needs light at three heights:
| Layer | Height | Purpose | Budget Option |
|---|---|---|---|
| Ambient | Ceiling | General illumination | Replace bulb with warm LED ($5) or add dimmer ($15) |
| Task | Eye-level | Reading, working, focused activities | Table lamp ($15-$35) or plug-in sconce ($20-$40) |
| Accent | Low/floor | Atmosphere, depth, eliminating dark corners | LED strip ($10-$20) or floor lamp ($25-$50) |
The color temperature rule:
This is the single most important lighting fact: warm light (2700K) makes spaces feel cozy and expensive. Cool light (4000K+) makes spaces feel clinical and cheap.
| Color Temperature | Appearance | Use For |
|---|---|---|
| 2700K | Warm white, slightly yellow | Living rooms, bedrooms, dining |
| 3000K | Neutral warm | Kitchens, bathrooms, workspaces |
| 4000K+ | Cool white, slightly blue | Garages, utility rooms ONLY |
Immediate upgrade: Walk through your home right now and check every bulb. Replace anything 3500K or higher with 2700K-3000K warm white LEDs ($8-$12 for a 6-pack). This $10 investment changes every room.
Budget lighting upgrades that work:
- Replace all bulbs first. Before buying any lamp, replace every bulb with warm white LEDs. This costs $10-$30 total and is 50% of the lighting battle.
- Add one floor lamp per room. A single floor lamp in a dark corner eliminates the “cave” feeling for $25-$50.
- Use plug-in wall sconces. No electrician needed. Mount to the wall, plug into an existing outlet. $15-$40 per sconce.
- Add LED strips behind furniture. A $10 LED strip behind your TV, under your bed, or behind a bookshelf creates instant ambient depth.

Tier 3: Textiles (Soft Goods That Ground a Room)
After paint and lighting, textiles have the highest visual impact. Rugs, curtains, bedding, and throw blankets are the “skin” of a room — they cover large surface areas, add texture, and introduce color in a way that feels integrated rather than applied.
The textile priority order:
| Priority | Item | Why It Matters | Budget Range |
|---|---|---|---|
| 1 | Curtains | Covers largest vertical surface after walls; controls light; adds softness | $20-$60 per window |
| 2 | Area rug | Defines seating areas; adds warmth; covers ugly floors | $40-$150 |
| 3 | Bedding | Dominates the bedroom visually; texture matters more than thread count | $30-$100 |
| 4 | Throw pillows + blankets | Adds color and texture to seating; easiest to swap seasonally | $15-$50 |
Budget textile strategies:
- Curtains: Hang them at ceiling height, not window height. This draws the eye up and makes ceilings feel taller. Buy the cheapest curtain rod that works ($10-$15) and spend on the panels themselves. Two panels per window minimum.
- Rugs: A rug that’s too small is worse than no rug. Your rug should be large enough for at least the front legs of all furniture to sit on it. For a living room, that’s typically 5×7 minimum, ideally 8×10.
- Bedding: A duvet cover + two pillowcases in a solid neutral ($30-$60) looks more expensive than a patterned set at the same price. Texture (linen-look, waffle weave, matelassé) reads as higher-end than pattern.
- Throw pillows: Buy inexpensive pillow covers ($8-$15 each), not new pillows. Swap covers seasonally. Stuff with budget pillow forms from craft stores.
Curtains $40, rug $60, duvet cover $35, pillow covers $24. Total: $159 for complete textile refresh.The Ikea test: For curtains, rugs, and basic bedding, IKEA beats almost every other option on price-to-quality ratio. Their $10-15 curtain panels and $20-$40 rugs are indistinguishable from items 3x the price once installed.

Tier 4: Furniture Arrangement & Editing
This tier costs $0 but creates visible change. Most rooms have too much furniture, placed poorly. Before buying anything new, edit what you have and rearrange it.
The editing process:
- Remove one piece of furniture from every room. Most rooms are 10-20% over-furnished. Identify the piece you use least and remove it. Empty space is a design element.
- Float furniture off the walls. Pushing everything against the walls creates a “waiting room” feel. Float your sofa 3-6 inches off the wall. Angle a chair. Create conversation groupings.
- Check pathways. You need 30-36 inches for main traffic paths, 18-24 inches for secondary paths. If furniture blocks flow, it’s in the wrong place.
- Relocate, don’t replace. That chair you hate might work in a different room. Move furniture between rooms before buying new.
The “shop your house” method:
Walk through your home with fresh eyes. Look for:
- Lamps that could move from a bedroom to a living room
- Art that would work better in a different space
- Side tables that could swap positions
- Baskets and bins that could organize a different area
- Throw blankets and pillows that could refresh a tired room
This costs nothing and often reveals that you already have what you need.
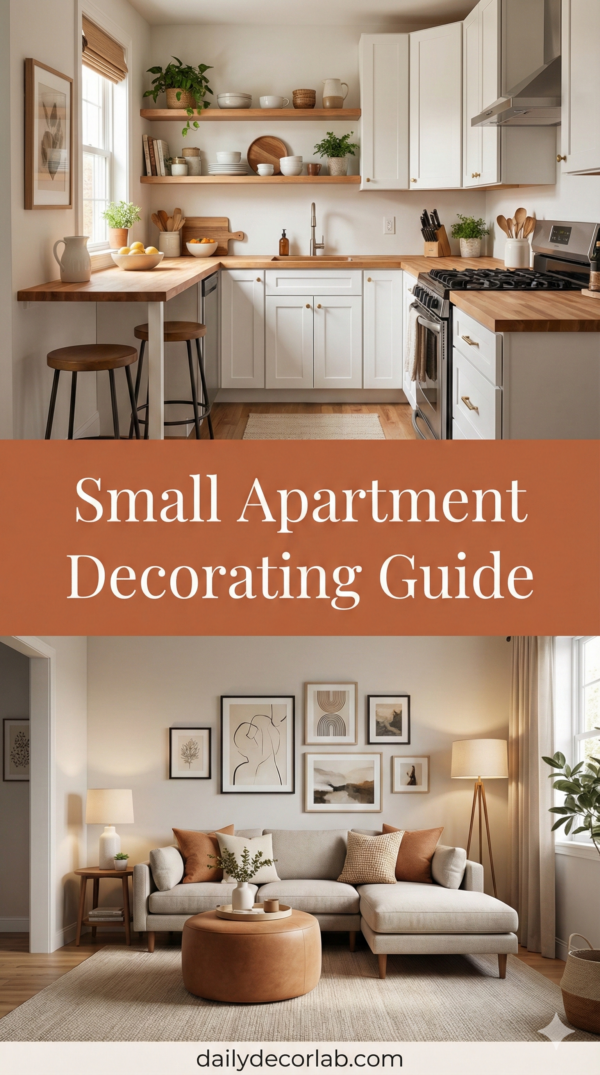
Same furniture, three arrangements. Middle: removed one piece. Right: floated furniture off walls.For small apartments: See our small apartment decorating guide for specific furniture arrangement layouts that maximize space without buying anything new.

Tier 5: Art & Wall Decor
Wall decor matters, but it’s Tier 5 for a reason: it’s a focal point, not a foundation. A gallery wall above a poorly painted, poorly lit room still looks bad. Nail the first four tiers, and simple wall decor will shine.
Budget art strategies that work:
| Strategy | Cost | Result |
|---|---|---|
| One large piece over many small ones | $25-$75 | One 24×36 or 30×40 piece makes a bigger statement than a 5-piece gallery wall. Look for sales at art discount sites. |
| DIY textured canvas art | $15-$30 | Make your own textured art with joint compound and canvas. Looks like $300 Etsy art. |
| Frame cheap prints properly | $20-$50 | A $10 print in a $30 frame looks better than a $100 print in a cheap frame. Matting elevates everything. |
| Use peel-and-stick wallpaper as “art” | $15-$30 | Frame a large section of removable wallpaper for instant abstract art that’s removable. |
| Gallery wall with thrift store frames | $20-$40 | Thrift mismatched frames, spray paint them the same color, fill with free printable art or your own photos. |
What to avoid:
- “Live Laugh Love” type signs. They read as generic and dated.
- Tiny art on big walls. A 12×12 print on a wall that needs 30×40 looks accidental.
- Art hung too high. The center of your art should be 57-60 inches from the floor (eye level). Most people hang art 6-12 inches too high.
Three approaches, same $40 budget. Left: one large discount print. Center: DIY textured canvas. Right: thrifted frame gallery wall.Frame sourcing: Thrift stores sell framed art for $3-$10. Buy for the frame, discard the art, add your own print. This costs 75% less than buying frames new.

Tier 6: Accessories & Styling Details
This is where most people start — and why most budget decorating fails. Accessories are the lowest-impact category per dollar. They’re the finishing touches, not the foundation.
The restraint principle:
A well-styled room has fewer accessories than you think. The difference between “curated” and “cluttered” is usually 30-50% fewer objects.
Budget accessory approach:
| Item | Budget | Where to Save |
|---|---|---|
| Vases and vessels | $5-$25 each | Thrift stores, dollar stores, spray-painted glass jars |
| Candles | $2-$15 each | Dollar store candles in glass holders, or just the holders without candles |
| Trays and bowls | $5-$20 each | Thrift, IKEA, spray-painted wood or metal |
| Plants | $5-$50 | Start small (4-6 inch pots), propagate from friends, buy low-maintenance varieties |
| Books | $0-$20 | Use books you own, thrift hardcovers, remove dust jackets for neutral spines |
The styling test:
For every surface (coffee table, shelf, nightstand), apply this rule: remove one item. If it looks better or the same, that item didn’t belong.
Dollar store decor hacks: See our dollar store decor hacks guide for 15 high-end dupes you can make for under $10 each.
Room-by-Room Budget Decorating Plans
Here’s how to apply the hierarchy to each room, with specific budgets and priorities.
Living Room: $200-$400 Total
| Priority | Item | Budget | Notes |
|---|---|---|---|
| 1 | Paint (if needed) | $35-$50 | One accent wall or full room |
| 2 | Warm white LED bulbs | $10 | Replace all bulbs |
| 3 | Floor lamp or table lamp | $25-$45 | Add task lighting layer |
| 4 | Curtains (2 panels + rod) | $35-$55 | Hang at ceiling height |
| 5 | Area rug (5×7 minimum) | $40-$80 | Large enough for front furniture legs |
| 6 | One large art piece or DIY art | $25-$50 | 24×36 minimum |
| 7 | Throw pillows (covers only) | $15-$30 | 2-3 covers in accent colors |
| Total | $185-$320 |
Bedroom: $150-$300 Total
| Priority | Item | Budget | Notes |
|---|---|---|---|
| 1 | Paint (if needed) | $35-$50 | Focus on wall behind bed |
| 2 | Warm white LED bulbs | $8 | 2700K for bedrooms |
| 3 | Duvet cover + pillowcases | $30-$60 | Solid neutral, textured fabric |
| 4 | Curtains (2 panels + rod) | $30-$50 | Blackout optional |
| 5 | Bedside table lamps | $20-$40 | Two if space allows |
| 6 | One large art piece above bed | $25-$40 | Horizontal orientation works best |
| 7 | Throw blanket + one pillow | $15-$25 | Texture at foot of bed |
| Total | $163-$265 |
Kitchen: $100-$200 Total
| Priority | Item | Budget | Notes |
|---|---|---|---|
| 1 | Paint (if needed) | $25-$40 | One accent wall or no paint |
| 2 | Warm white LED bulbs | $8 | 3000K for kitchens |
| 3 | Under-cabinet LED strip | $15-$25 | Instant task lighting upgrade |
| 4 | New cabinet hardware | $20-$40 | Pulls and knobs, renter-save originals |
| 5 | Peel-and-stick backsplash | $20-$40 | Renter-friendly |
| 6 | Counter styling (tray + 2-3 items) | $15-$25 | Fruit bowl, cutting board, plant |
| Total | $103-$178 |
For full kitchen makeover options: See our kitchen decor budget updates guide for 12 under-$50 ideas.
Entryway: $50-$100 Total
| Priority | Item | Budget | Notes |
|---|---|---|---|
| 1 | Warm white LED bulb | $5 | Often overlooked |
| 2 | Wall-mounted key holder + shelf | $15-$25 | Creates instant drop zone |
| 3 | Slim shoe bench or mat | $20-$35 | Contain shoe clutter |
| 4 | Mirror | $15-$30 | Thrift or discount store |
| 5 | One small plant or vase | $5-$10 | Fresh touch |
| Total | $60-$105 |
No entryway? See our small entryway ideas guide for creating a drop zone in any layout.
Bathroom: $75-$150 Total
| Priority | Item | Budget | Notes |
|---|---|---|---|
| 1 | Warm white LED bulbs | $8 | 3000K for bathrooms |
| 2 | Shower curtain | $15-$30 | The largest visual element |
| 3 | Matching towels (2-4) | $15-$30 | White reads cleanest |
| 4 | Peel-and-stick floor tiles (optional) | $20-$40 | Renter-friendly floor refresh |
| 5 | Shelf or over-toilet storage | $15-$30 | Adds vertical storage |
| 6 | Styled tray with 2-3 items | $10-$20 | Soap dispenser, plant, candle |
| Total | $83-$158 |
Room-by-room budget priorities. Living room and bedroom get the most investment; entryway and bathroom transform for under $100.Renter bathroom? See our renter bathroom makeover guide for lease-safe upgrades.

Whole-Home Budget Calculator
Here’s how to allocate a total budget across your entire home. These assume a 1-2 bedroom apartment or small house.
$500 Whole-Home Budget
| Room | Allocation | Key Items |
|---|---|---|
| Living room | $200 | Paint, lighting, curtains, rug |
| Bedroom | $150 | Bedding, lighting, curtains |
| Kitchen | $75 | Hardware, under-cabinet lights |
| Bathroom | $50 | Shower curtain, towels |
| Entryway | $25 | Key holder, mat |
| Total | $500 |
$1,000 Whole-Home Budget
| Room | Allocation | Key Items |
|---|---|---|
| Living room | $350 | All $200 items + larger rug, better art |
| Bedroom | $250 | All $150 items + headboard or bench |
| Kitchen | $150 | All $75 items + peel-stick backsplash |
| Bathroom | $100 | All $50 items + storage shelf |
| Entryway | $50 | All $25 items + mirror |
| Dining/office | $100 | Lighting, rug, or art (if applicable) |
| Total | $1,000 |
$2,000 Whole-Home Budget
| Room | Allocation | Key Items |
|---|---|---|
| Living room | $600 | All items + quality sofa or chair upgrade |
| Bedroom | $400 | All items + mattress topper, bench |
| Kitchen | $250 | All items + rolling cart, bar stools |
| Bathroom | $200 | All items + mirror upgrade, hardware |
| Entryway | $100 | All items + storage bench |
| Dining/office | $250 | Desk, chair, lighting |
| Decor reserve | $200 | Styling extras, seasonal swaps |
| Total | $2,000 |
Budget allocation at three levels. Living room and bedroom always dominate; accessories remain a small slice.The rule: Always prioritize paint and lighting first. If budget is tight, reduce accessory spending before reducing paint or lighting budgets.

Budget Decorating Mistakes That Waste Money
These are the most common errors that turn budget decorating into wasted spending.
1. Starting with accessories instead of foundations
Throw pillows, candles, and vases are the most tempting purchases — but they have the lowest visual impact. A room with $200 in accessories but bad lighting and bare walls still looks unfinished.
Fix: Complete Tiers 1-4 before buying a single accessory.
2. Buying cheap versions of expensive items
A $50 “faux leather” sofa that cracks in 6 months costs more than saving for a $300 quality piece. A $20 ” Persian-style” rug that pills and sheds costs more than a $60 low-pile solid rug.
Fix: When you can’t afford quality, buy less. One good pillow is better than three cheap ones.
3. Impulse buying without a plan
The clearance section is a budget trap. Items bought because they’re “on sale” but don’t fit your space, color scheme, or needs are wasted money.
Fix: Shop with a specific list. If it’s not on the list, it’s not a deal — it’s a distraction.
4. Ignoring lighting entirely
A beautifully decorated room with one harsh overhead light will look worse than a minimally decorated room with warm, layered lighting.
Fix: Budget for lighting before anything else. Replace bulbs first, add lamps second.
5. Choosing trend colors over timeless neutrals
That terracotta accent wall might look great on Instagram today, but in 2 years it’ll feel dated — and you’ll spend $50 repainting.
Fix: Use neutrals for expensive/hard-to-change items (paint, rugs, sofas). Express trends in cheap/swappable items (pillows, throws, accessories).
6. Undersized rugs
A 4×6 rug in a living room makes the space feel smaller. A too-small rug is a waste of the money you spent on it.
Fix: Measure first. Your rug should allow at least front furniture legs to sit on it. When in doubt, go larger.
7. Forgetting thrift stores and DIY
New isn’t always better. Thrift stores have frames, lamps, furniture, and decor at 70-90% off retail. DIY projects can produce custom results for a fraction of the cost.
Fix: Check thrift stores before retail. Consider DIY for art, simple furniture, and decor. See our guides on thrift store decor shopping and upcycled home decor projects.
Four money-wasting mistakes and their fixes. Every mistake is spending in the wrong place.
Frequently Asked Questions
How to decorate your home on a low budget?
Start with the Budget Decor Hierarchy: paint and color first ($25-$50), lighting second ($15-$50), and textiles third ($30-$100). These three categories transform a room for under $200 total. Never start with accessories — they have the lowest visual impact per dollar. Replace all light bulbs with warm white LEDs ($10) before buying anything else.
How can I make my house look nice for cheap?
The cheapest improvements with the highest impact are: (1) replace all bulbs with warm white 2700K LEDs, (2) declutter and remove one piece of furniture from each room, (3) hang curtains at ceiling height instead of window height, (4) rearrange furniture to float off walls, and (5) add one floor lamp to any room with a dark corner. These five changes cost under $100 total.
What is the cheapest way to decorate a room?
Paint is the cheapest transformative element. One gallon ($25-$35) covers an entire room’s walls. If you can’t paint, focus on lighting: warm bulbs ($10) and one floor lamp ($25). A room with good lighting and bare walls looks better than a room with poor lighting and expensive decor.
How to decorate when you’re broke?
Decorate for free by “shopping your house” — move furniture, art, lamps, and textiles between rooms to refresh spaces without spending anything. Declutter and edit — removing furniture often improves a room more than adding it. Rearrange what you have following the furniture arrangement principles above. These changes cost $0 and create visible transformation.
Start Your Budget Decorating Today
Budget home decorating isn’t about finding the cheapest items — it’s about spending in the right order. Paint and color first. Lighting second. Textiles third. Furniture arrangement fourth. Art fifth. Accessories last.
Follow the hierarchy. Spend top-down. And when in doubt, edit before you buy.
Want the full planning tool? Download the free Budget Decor Planner Spreadsheet — a Google Sheets template with room-by-room budget calculators, item checklists, and a total budget tracker.
A complete living room transformation for $287 using the Budget Decor Hierarchy. Paint, lighting, curtains, rug, art — in that order.
- [x] Review content calendar and SEO skill documentation
- [x] Identify A07 topic and requirements
- [x] Create A07 directory structure
- [x] Write A07 article (article.md)
- [ ] Create meta.json for A07
- [ ] Create image_prompts.json for A07
- [ ] Update content calendar