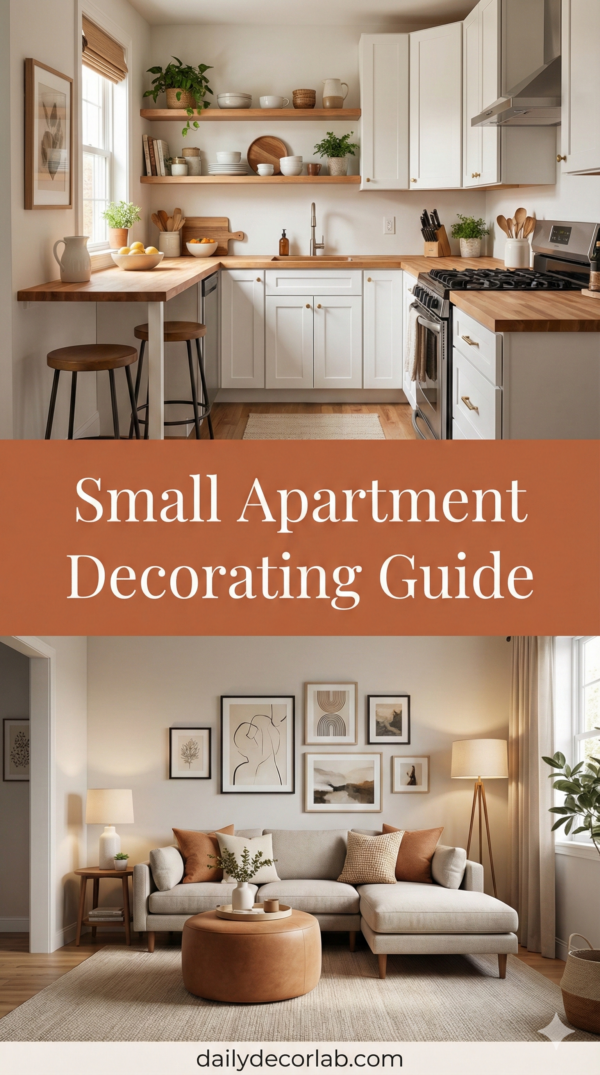
Finding the right small living room layout is the difference between a room that feels cramped and one that feels intentional. The problem isn’t your room size — it’s that most furniture arrangement advice assumes you have 300+ square feet to work with, and most of us don’t.
I’ve rearranged furniture in over a dozen small living rooms (including three of my own apartments under 500 sq ft), and the same lesson keeps repeating: the layout matters more than the furniture. A $400 sofa in the right position beats a $2,000 sofa in the wrong one.
Want the quick version? Download our free printable floor plan templates for all 7 layouts below — sized to standard small living room dimensions so you can sketch your furniture directly onto them.
In this guide, you’ll get 7 proven small living room furniture arrangements, each with a bird’s-eye floor plan diagram, specific measurements, and a “Works Best For” tag so you can match your exact room shape.

7 layouts, 7 room shapes. Find yours below.
Table of Contents
How to Choose the Right Layout for Your Room
Before moving a single piece of furniture, you need two things: your room’s measurements and your room’s primary function.
Step 1: Measure your room. Grab a tape measure and record the length and width of your living room in feet. Note the positions of doors, windows, and any architectural features (fireplace, radiator, built-in shelving). According to the National Association of Home Builders, the average living room in new US homes is approximately 330 sq ft — but in apartments built before 2000, living rooms frequently fall between 120-200 sq ft.
Step 2: Identify your primary use. Be honest about how you actually use the room:
| Primary Use | Best Layout(s) | Key Requirement |
|---|---|---|
| Watching TV / streaming | Layout 3 (TV Triangle) | Clear sightline from all seating to TV |
| Hosting friends | Layout 5 (Conversation Pair) | Face-to-face seating, flexible surfaces |
| Working from home | Layout 7 (Multi-Zone) | Distinct work area separated from lounge |
| General living (mixed use) | Layout 1 (Floating Sofa) or Layout 2 (L-Shape) | Flexible, balanced arrangement |
| Studio apartment | Layout 4 (Open Concept Divider) | Room division without walls |
Step 3: Check your pathways. Every layout below maintains a minimum 30-inch walkway — the standard for comfortable foot traffic recommended by interior design professionals (source: HGTV layout guidelines). If a layout forces you below 30 inches anywhere, it’s the wrong layout for your room.
The golden rule of small living room furniture arrangement: Measure twice, move once. Tape out your furniture footprints on the floor with painter’s tape before committing to a layout. This 10-minute step saves hours of frustration.
Layout 1: The Floating Sofa
Works best for: Square or near-square rooms (10×10 to 12×14 ft)
This is the most versatile small living room layout and the one I recommend starting with if you’re unsure. The core move: float your sofa 3-6 inches away from the wall instead of pushing it flat against it.

Layout 1: Floating Sofa. Sofa centered on longest wall, pulled 4 inches forward. Side table and floor lamp at left, coffee table centered with 18″ clearance.
Why it works: Floating the sofa creates an air gap that makes the room feel less like a waiting room. Research from the Journal of Environmental Psychology consistently shows that perceived room size increases when furniture doesn’t touch walls — even by just a few inches.
The setup:
- Sofa: Centered on the longest wall. Maximum sofa length = 75% of the wall width. For a 10-foot wall, your sofa should be no longer than 90 inches (7.5 feet). Pull it 3-6 inches from the wall.
- Coffee table: Centered in front of the sofa with 16-18 inches of clearance between sofa edge and table edge. Choose a table no wider than two-thirds the sofa length.
- Side table: One side table at the arm of the sofa closest to a power outlet (for a lamp). Choose one with a shelf or drawer for hidden storage.
- Floor lamp: In the corner behind the side table. This creates a layered lighting setup — ambient from overhead, task from the lamp.
- TV: Mounted on the opposite wall, centered on the sofa’s sightline. Wall-mounting frees floor space vs. a TV stand.
Furniture dimensions for this layout (12×12 room):
| Piece | Recommended Size | Floor Footprint |
|---|---|---|
| Sofa | 72-84″ wide x 34″ deep | ~20 sq ft |
| Coffee table | 42-48″ wide x 22″ deep | ~7 sq ft |
| Side table | 18-22″ round or square | ~3 sq ft |
| Floor lamp | 10-12″ base diameter | ~1 sq ft |
| Total furniture footprint | ~31 sq ft (21% of 144 sq ft room) |
Pro tip: Keep your total furniture footprint under 30-35% of the room’s square footage. This guarantees at least 40% visible floor — a key principle from the 5 Small Space Rules.
Layout 2: The L-Shape Anchor
Works best for: Narrow or rectangular rooms (9×16, 10×18, or similar)
Narrow living room layout ideas almost always come back to the L-shape. Instead of fighting the room’s proportions, this layout works with them by anchoring furniture in an L-shaped configuration against two adjoining walls.
Layout 2: L-Shape Anchor. Sofa along the long wall, accent chair perpendicular. Creates a conversational corner without blocking the pathway down the room’s length.
The setup:
- Sofa: Along the longer wall, positioned toward one end of the room (not centered). This opens up the other end for circulation or a secondary zone.
- Accent chair: Perpendicular to the sofa, against the short wall, forming the “L.” Choose a chair with exposed legs and a slim profile (avoid bulky recliners).
- Coffee table: A round or oval table works best here — rectangular tables in narrow rooms create tight squeeze points. Place it where the L intersects, with 16-18 inches clearance on all sides.
- Console or narrow shelf: Along the opposite long wall, if space allows. A 10-12 inch deep console provides surface space without narrowing the walkway.
Why it works for narrow rooms: The L-shape creates a “room within a room” at one end of the rectangle, leaving the other end as open circulation space. This prevents the bowling-alley effect that happens when furniture lines both long walls.
The 3:1 rule for narrow rooms: If your room is more than 3x longer than it is wide (e.g., 8×26 ft), consider Layout 4 (Open Concept Divider) instead — the L-Shape works best at ratios up to about 1:1.8.
Layout 3: The TV Triangle
Works best for: Media-focused rooms, rooms where streaming/gaming is the primary activity
This is the go-to small living room layout with TV as the focal point. The “triangle” refers to the geometric relationship between the TV, the primary seating, and a secondary seating position — all forming a triangle that ensures everyone has a clear sightline.
Layout 3: TV Triangle. TV wall-mounted center, sofa directly opposite, accent chair at 45° angle. Dotted lines show sightlines — every seat sees the screen.
The setup:
- TV: Wall-mounted on the shortest wall, at eye level when seated (center of screen at approximately 42 inches from the floor, per Society of Motion Picture & Television Engineers ergonomic guidelines). Wall-mounting is non-negotiable in a small room — a TV stand wastes 4-6 sq ft of floor space.
- Sofa: Directly opposite the TV, 6-10 feet away. The ideal viewing distance for a 55″ TV is 7-11.5 feet (Samsung viewing distance calculator). In a small room, you’ll be at the close end of this range, which is fine.
- Accent chair: At a 30-45° angle to both the TV and sofa, forming the third point of the triangle. This seat is for secondary viewing and conversation.
- Media storage: A low, wall-mounted floating shelf below the TV for a soundbar, streaming device, and 2-3 objects maximum. No floor-standing media cabinets.
Sightline check: Sit in every seat and verify you can see the entire TV screen without turning your head more than 30°. If any seat fails this test, adjust the angle.
Budget note: A basic TV wall mount costs $15-$35 and takes 30 minutes to install. If you’re renting, use a no-drill mount ($25-$45) that uses heavy-duty adhesive strips instead of screws.
Layout 4: The Open Concept Divider
Works best for: Studio apartments, open floor plans, or any room that needs to serve as both living room and another function
When you need a small open concept living room layout, furniture itself becomes the wall. This layout uses the sofa’s back as a visual divider between the living zone and another zone (dining, sleeping, or entry).
Layout 4: Open Concept Divider. The sofa’s back creates a visual boundary between living and dining zones. No physical wall needed.
The setup:
- Sofa: Floated into the room with its back facing the secondary zone (kitchen, dining area, or bed). This is the room divider. Choose a sofa with a clean, finished back (no exposed staples or unfinished fabric).
- Behind the sofa: A narrow console table (10-12″ deep) placed flush against the sofa’s back. This serves as a landing surface for the secondary zone — a place for mail, keys, or a table lamp that lights both zones.
- In front of the sofa: Your living room setup — coffee table, TV on the opposite wall, floor lamp.
- Rug: A rug under the living room zone that does NOT extend into the secondary zone. The rug edge visually reinforces the boundary. See our guide on styling principles for more on using rugs to define zones.
Critical measurement: The sofa-as-divider only works if you have at least 7 feet of depth from the sofa front to the wall behind the TV. Less than that, and the “living room” side feels too compressed.
For full studio apartment strategies beyond just the living room, see our studio apartment zoning guide.
Layout 5: The Conversation Pair
Works best for: Rooms used primarily for entertaining and socializing
Most layouts point all seating at the TV. This one points seating at each other. If you’re wondering how to arrange furniture in a small living room for hosting, this is the answer.
Layout 5: Conversation Pair. Two accent chairs face the sofa across a coffee table. Everyone is within arm’s reach of a surface.
The setup:
- Sofa: On one wall (floated 3-4 inches off).
- Two accent chairs: Directly opposite the sofa, angled slightly inward (5-10°). The chairs should be narrow-profile — look for chairs 26-30 inches wide, not the 34-36 inch club chairs that eat small rooms alive.
- Coffee table: Centered between sofa and chairs. A round table works best here to allow easy movement around it. Keep 16 inches of clearance on all sides.
- Two small side tables: One between the two chairs, one at the sofa arm. Every seat should be within arm’s reach of a surface — this is the hosting standard.
Why two chairs instead of a loveseat? Two individual chairs provide more flexibility. They can be moved apart for circulation, angled differently for different group sizes, or pulled to other rooms when needed. A loveseat is a fixed object; two chairs are a system.
The 8-foot test: This layout requires at least 8 feet between the sofa wall and the chair wall. At 7 feet, the coffee table clearance gets too tight. If your room is under 8 feet in the seating direction, use Layout 1 instead.
Want to grab our printable floor plan PDFs for all 7 layouts? Each template is scaled to standard room sizes so you can test arrangements on paper before moving anything.
Layout 6: The Fireplace Frame
Works best for: Rooms with a fireplace or a dominant architectural feature
A small living room layout with fireplace needs to treat the fireplace as the anchor point — not the TV. Fighting the room’s natural focal point creates visual tension that makes the space feel chaotic.
Layout 6: Fireplace Frame. Symmetrical arrangement centered on the fireplace. TV mounted above the mantel or on an adjacent wall.
The setup:
- Fireplace: This is your focal wall. Everything orients toward it.
- Sofa: Facing the fireplace directly, centered on it. If the fireplace is off-center on its wall, center the sofa on the fireplace, not the wall — visual balance follows the focal point.
- Two chairs or a chair + side table: Flanking the fireplace on either side, angled slightly inward. This creates a symmetrical frame that draws the eye to the fire.
- TV placement: Three options: (1) mounted above the fireplace mantel (if the mantel is no higher than 48″ — otherwise the viewing angle strains your neck), (2) on an adjacent wall at a 90° angle to the sofa, or (3) on a swivel mount on the wall next to the fireplace.
- Rug: Centered on the fireplace, large enough for all front furniture legs to rest on it.
The symmetry principle: Symmetrical arrangements feel calm and spacious because the brain processes them faster. In a small room, reducing visual complexity is critical — this is a core concept behind styling with restraint.
Renters with non-functional fireplaces: Fill the firebox with a cluster of pillar candles (3-5, varying heights) or stack books inside it. A dark, empty firebox is a visual dead zone that makes the room feel colder. See our rental apartment decor guide for more renter-safe styling ideas.
Layout 7: The Multi-Zone
Works best for: Living rooms that double as a home office, study area, or hobby space
This layout divides one room into two distinct functional zones using furniture placement and rugs — no partition screens or curtain dividers needed. It’s the ideal living room layout for small spaces that need to work double-duty.
Layout 7: Multi-Zone. A slim bookshelf tower acts as a visual divider between the lounge zone and work zone. Each zone has its own rug and lighting.
The setup:
- Zone 1 (Living): Standard sofa + coffee table arrangement on one side of the room, anchored by a rug.
- Zone 2 (Work): A wall-mounted desk or small writing desk against the opposite wall or in a corner, with its own task lamp and a small rug or chair mat beneath it.
- The divider: A slim, open bookshelf tower (12-16″ wide, 60-72″ tall) placed perpendicular to the wall between the two zones. Open shelving lets light pass through while providing visual separation. Alternatively, a tall plant or a floor lamp can serve as a softer divider.
- Lighting: Each zone gets its own light source. The living zone gets ambient + accent lighting; the work zone gets a dedicated task lamp. This reinforces the psychological boundary between “relax” and “work.”
The facing-away rule: Position your desk chair so you face away from the living zone while working. If you can see the sofa and TV from your desk, you’ll be distracted. Face the work zone toward a wall or window.
For a complete guide to organizing your living room’s storage systems alongside these layouts, check out our home organization system guide.
3 Small Living Room Layout Mistakes That Make Rooms Feel Smaller
These errors are more common than any of the 7 layouts above:
1. Pushing everything against the walls. The instinct is to “maximize floor space” by ringing furniture around the perimeter. The result: a big empty center surrounded by a tight ring of furniture — the “waiting room” effect. Every layout above floats at least one piece away from the wall. Even 3 inches makes a difference.
2. Using a rug that’s too small. A rug should be large enough for at least the front legs of your sofa and chairs to sit on it. A 4×6 rug under a full-size sofa makes the room look fragmented and unanchored. For most small living rooms, a 5×7 or 6×9 rug is the minimum functional size. Rugs USA’s sizing guide has a helpful visual reference.
3. Blocking the sight lines to windows. Tall furniture in front of or next to windows blocks natural light and makes a room feel smaller. Keep your tallest furniture pieces (bookshelves, storage towers) on walls without windows. Low-profile pieces (sofa, coffee table) can be near windows without blocking light.
Left: everything against the walls creates the “waiting room.” Right: floating the sofa 4 inches and adding an angle opens the entire room.
Frequently Asked Questions
What is the best layout for a small living room?
The Floating Sofa (Layout 1) is the most universally effective small living room layout because it works in nearly any room shape and doesn’t require specific architectural features. Float your sofa 3-6 inches off the wall, keep your total furniture footprint under 30-35% of the floor area, and maintain 30-inch walkways. If your room is narrow, the L-Shape Anchor (Layout 2) is a better fit.
How do you arrange a living room with limited space?
Start by measuring your room and identifying your primary activity (TV watching, hosting, working). Then choose the layout above that matches your room shape and use case. The single most important rule: maintain at least 30 inches of walkway space between all furniture edges. If a layout doesn’t give you that, downsize your furniture or choose a different arrangement.
Should a couch be against the wall in a small room?
No — and this is one of the most persistent decorating myths. Floating your sofa even 3-6 inches away from the wall makes the room feel more open, not more cramped. The air gap prevents the “pushed-in” feeling and creates the illusion of more space. The only exception is if your room is under 8 feet wide, where even a few inches of float may compromise your walkway.
How to make a small living room look bigger with furniture?
Three furniture strategies expand a small room visually: (1) choose pieces with exposed legs so you can see floor beneath them, (2) select a round coffee table instead of rectangular — round tables have no hard corners for you to bump into and they improve traffic flow, and (3) use transparent or light-colored furniture (glass coffee table, light wood tones, linen upholstery) which visually recedes rather than dominating the space.